Installation method of cold shrink terminal
【Abstract】 Electricity is the main source of power for production and life in today’s society. With the continuous expansion of urban scale and the improvement of modern production, the power transmission and power supply system presents: huge power supply network, complex power supply system, many power supply links, and long power supply distance. Features. More and more power safety accidents also occur frequently, posing no small threat to the safety of people's lives and property, so we should have a complete security system. |
Cold Shrink Cable Accessories
As an important transmission tool for the entire power supply network, the safety of the connection point between the cable and the cable is particularly critical. The cold shrinkable cable accessories have excellent insulation and high elasticity, and always maintain a suitable radial pressure on the cable body after installation. The inner interface is tightly combined, and there will be no electrical breakdown due to the respiration of the cable during operation. The stress control part is combined with the main insulation, which effectively solves the problem of electrical stress concentration at the outer shielding surface of the cable, ensures reliable insulation, and provides an important guarantee for the stability and safety of power transmission.Suzhou Jiuwei Electric Manufacturing Co., Ltd.; The developed cable accessories with extremely high elasticity, good insulation performance, tracking resistance, hydrophobicity, weather resistance, and UV aging resistance provide all-round protection for the safety of power operation.
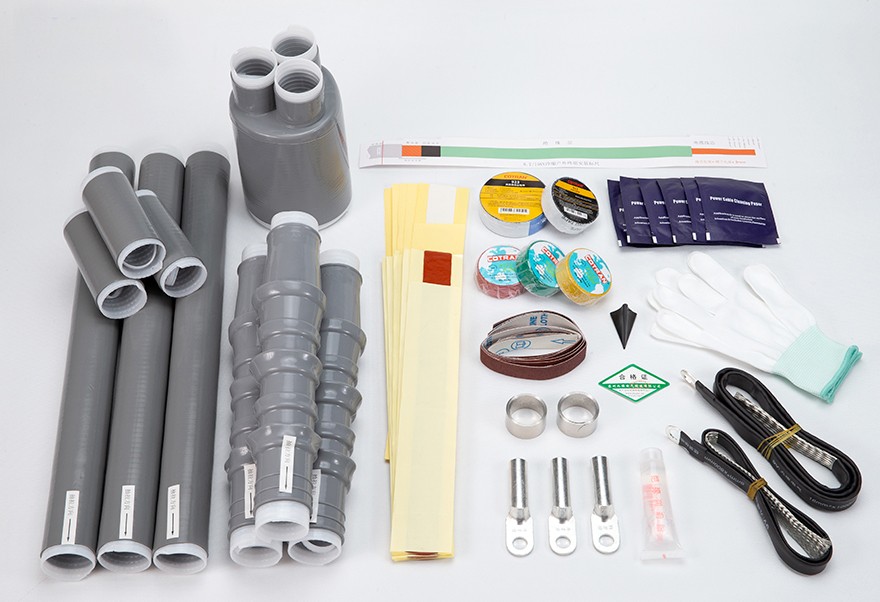
Since the cable accessories are manually installed on site, and affected by the construction environment and operating environment, breakdown and explosion accidents will inevitably occur due to installation errors, external force damage, and cable water ingress. Moreover, a large amount of energy will be released in the event of breakdown and explosion of the cable joint, which will cause harm to other surrounding power facilities or personnel, and even cause secondary accidents. In response to these problems,Jiuwei Electric; specially produced a detailed installation video about cold shrinkable cable terminals, hoping that this video can help more electricians and power practitioners to do a better and complete job.
Next, I will explain to you how to install the cold-shrinkable power intermediate joint to ensure the most perfect connection of power (a complete installation tutorial video is attached below)
1. Preparations before installation:
a: It should be noted that the installation site is free of dust and maintains a dry and ventilated environment.
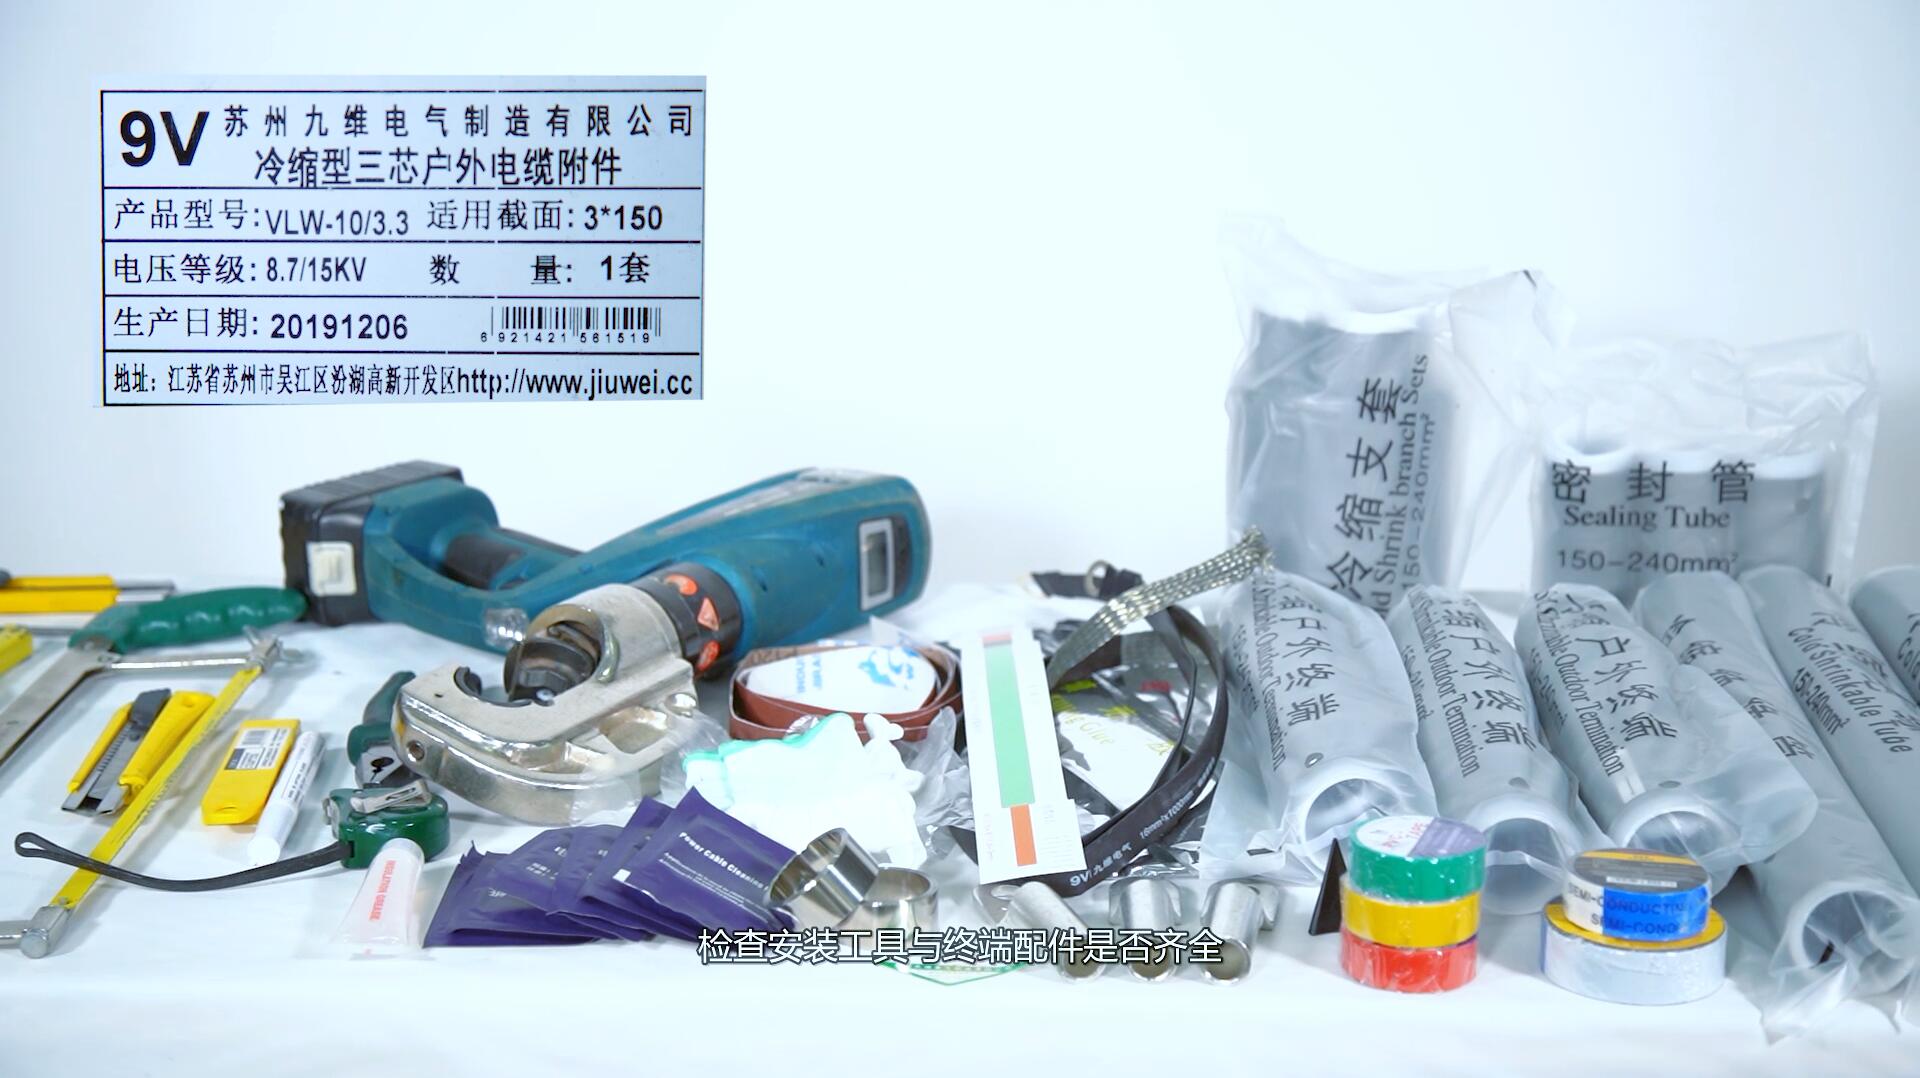
b: Check whether the installation tools and terminal accessories are complete.
c: Check whether the cable accessories match the cable.
2. Stripping
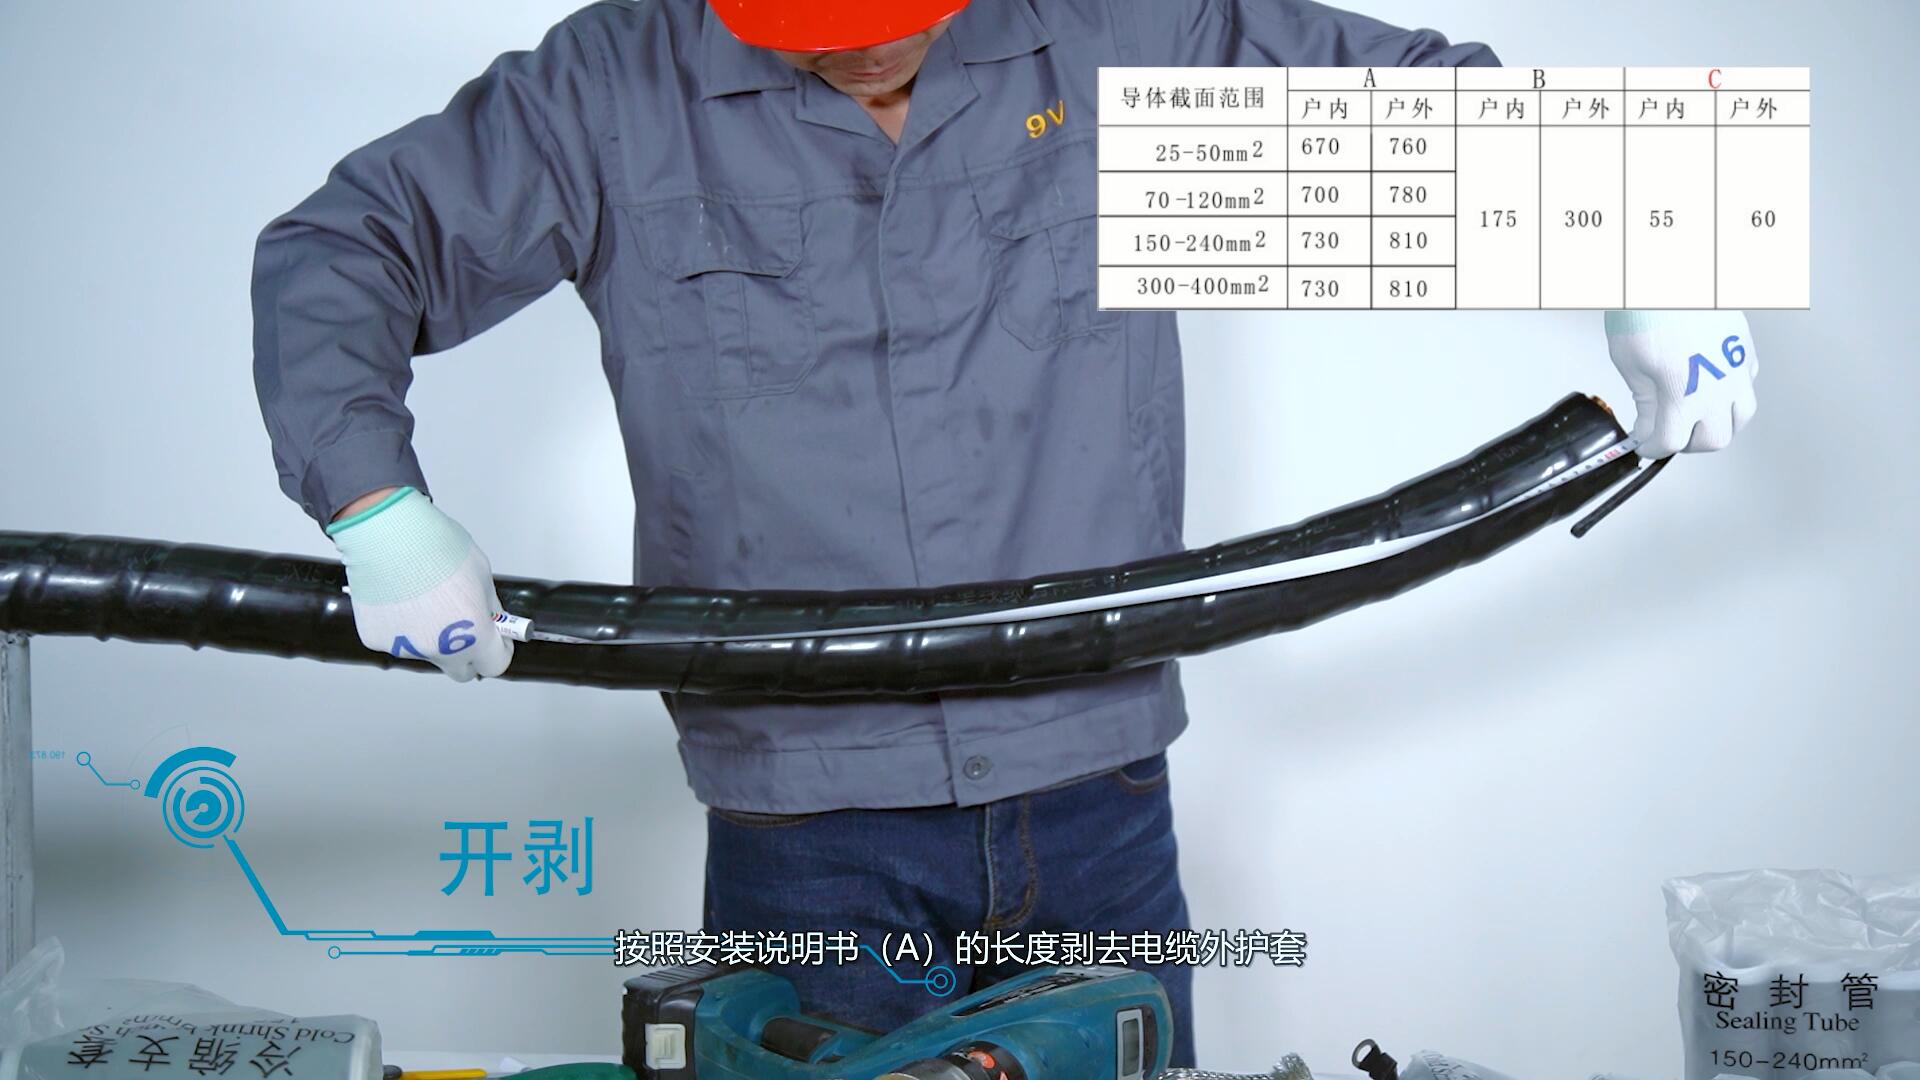
a: Strip the outer sheath of the cable according to the length of the installation instructions.
b: Leave 30mm steel armor at the bottom, and peel off the rest of the steel armor.
c: Leave 10mm inner sheath at the root, strip off the inner sheath of the remaining cables, and strip off the filler.
d: The three phases are separated, and the copper shield of each phase cable end is wrapped with PVC tape.
3. Grounding
a: Wipe off the dirt on the surface of the 50mm peeling of the outer sheath of the cable.
b: Grind the steel armor with coarse sandpaper, and fix the armored grounding wire on the steel armor with a constant force spring.
c: Wrap the constant force spring and steel armor with PVC tape.
d: Use a triangular pad cone to embed the copper shielded grounding wire into the three-phase bifurcation of the cable, fix it on the copper shielding layer with a constant force spring, and wrap the constant force spring with PVC tape.
e: Fill the gap between the two constant force springs with filler glue and wrap the constant force spring.
f: Wrap a layer of insulating self-adhesive tape around the filler, and overlap the outer sheath by 10mm.
g: Wrap a layer of sealant at the overlap between the outer sheath of the cable and the insulating self-adhesive tape.
4. Install cold shrink sleeves and cold shrink tubes
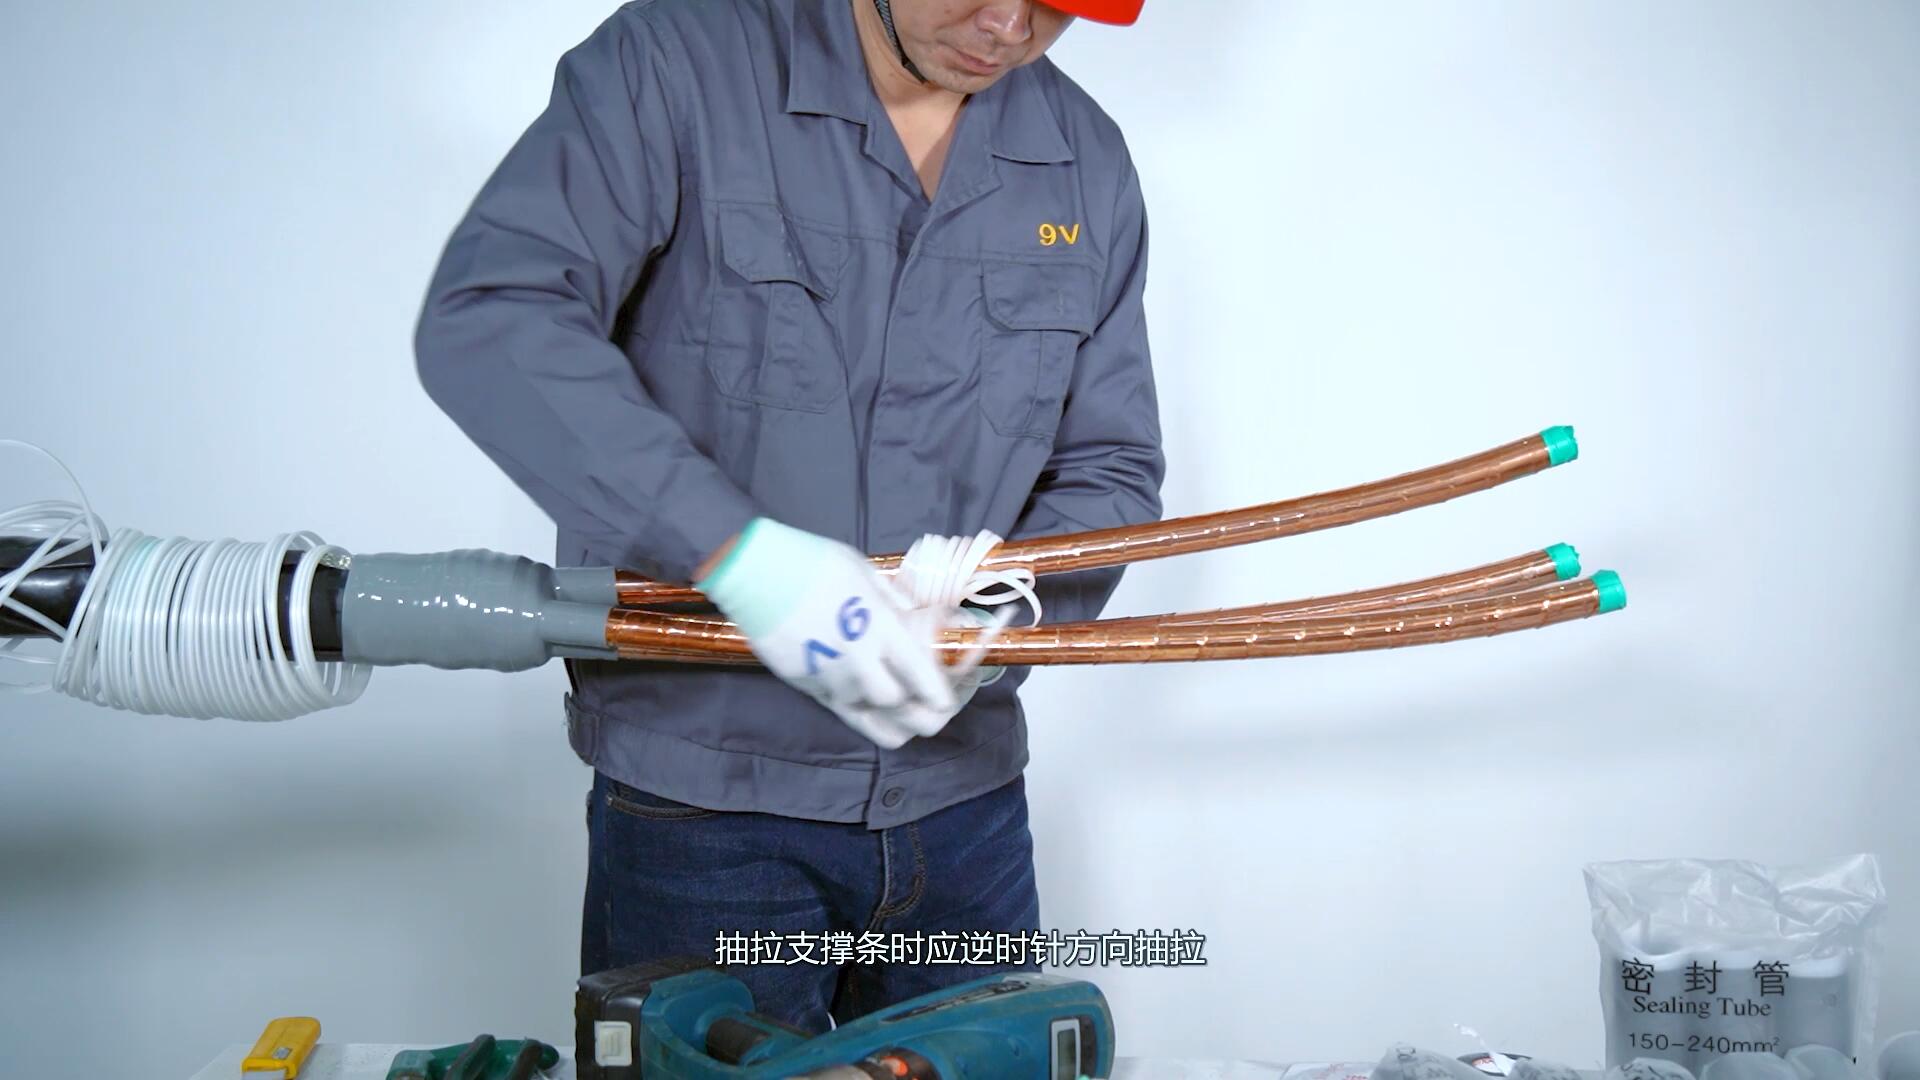
a: Put in three cold shrink sleeves to the root, and remove the support strip. When pulling, the branch support strip should be pulled first, then the root support strip should be pulled, and the support strip should be pulled counterclockwise.
b: Insert the cold-shrinkable insulating tube in the correct direction, and the cold-shrinkable tube and the finger end of the support sleeve are overlapped by 20-30mm
5. Copper shielding, semiconductor layer processing
a: Use a ruler to check the length between the top of the cable and the cold shrink tube, and cut off the excess cold shrink tube.
b: Determine the length of the copper shielding layer according to the ruler, mark and fix the copper shielding layer with PVC, and mark the phase respectively.
c: Determine the stripping length of the semiconducting layer according to the ruler, make a mark and strip and cut the semiconducting layer. Use a tool to chamfer the end of the semiconducting layer to make the transition between the semiconducting layer and the insulating layer smooth.
d: According to the depth of the terminal hole and the length of 3mm, cut off the insulation of each phase.
e: Sand the surface of the insulating layer with fine sandpaper. (Be careful not to sand the semiconducting layer when grinding the insulating layer).
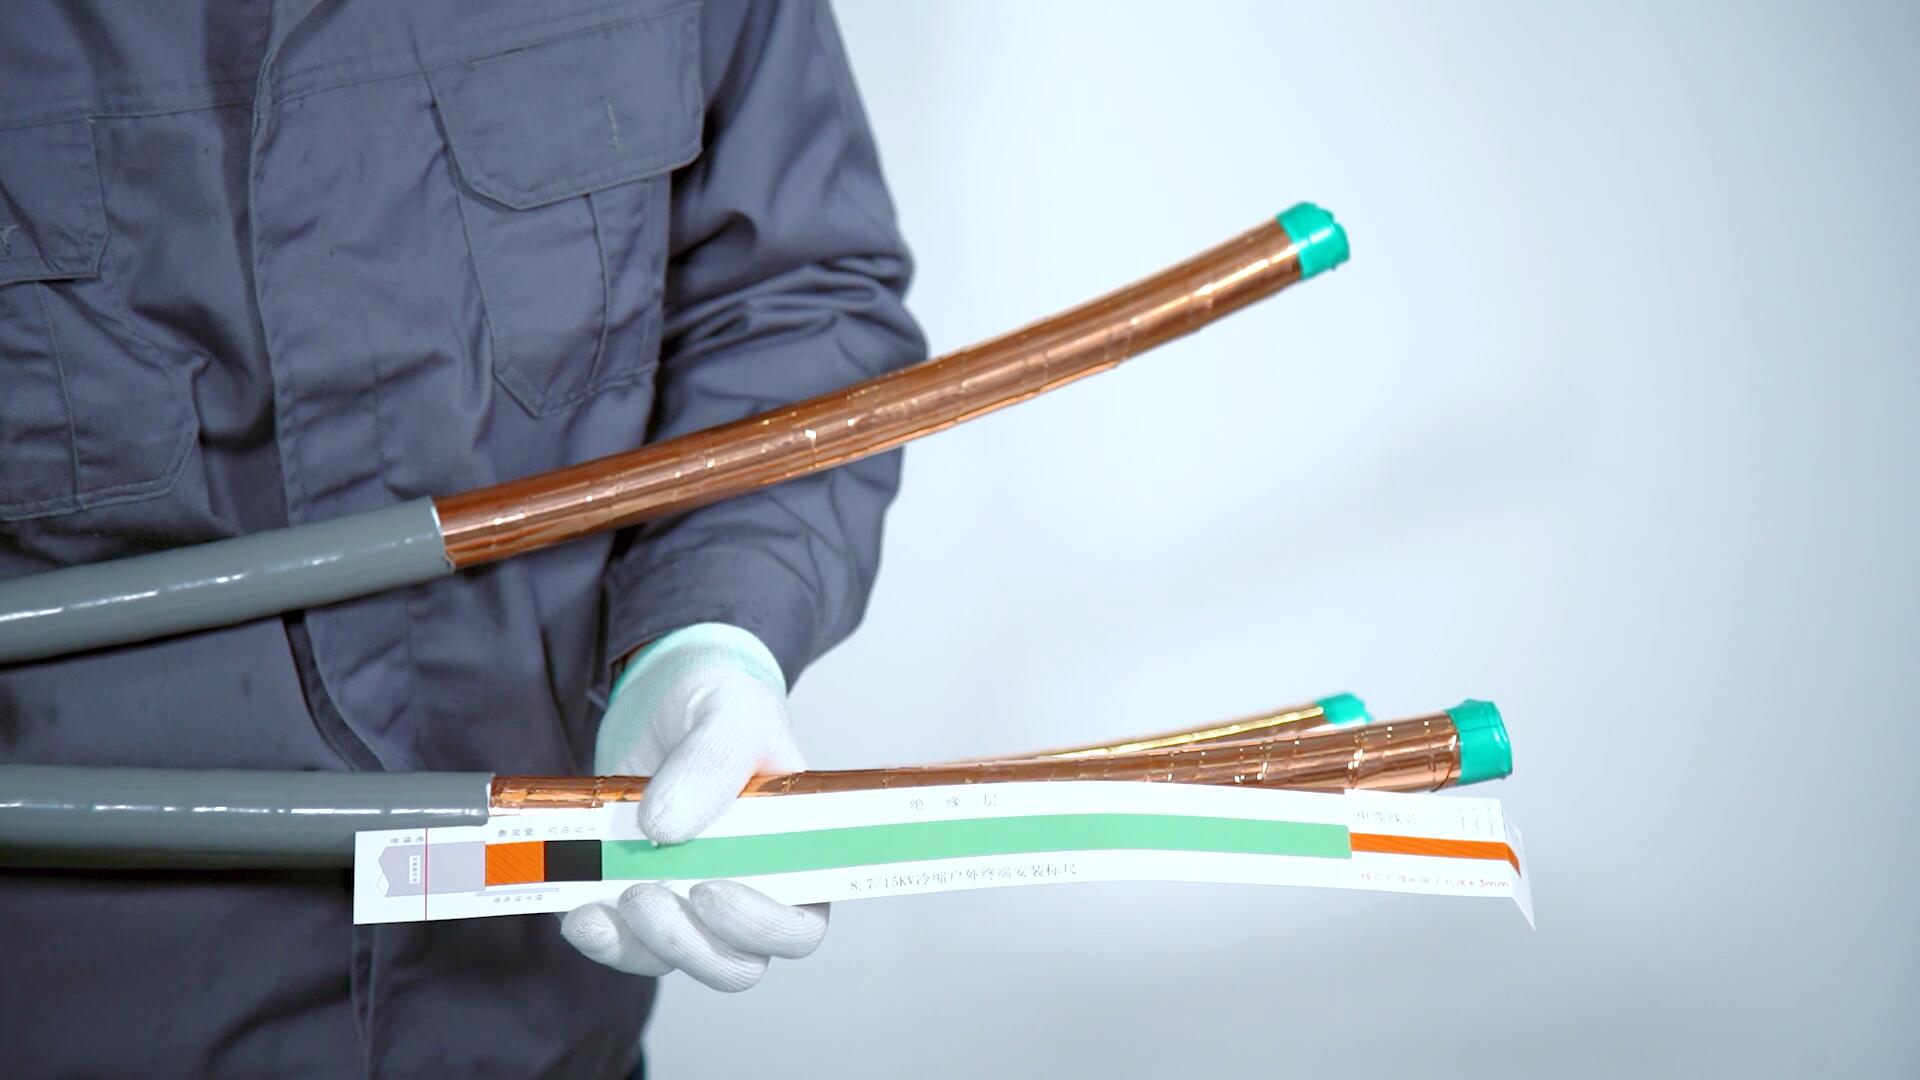
6. Install the terminal head
a: Use cleaning paper to clean the surface of the insulating layer towards the semi-conductive layer.
b: Wrap the semi-conductive tape at the copper shield in a semi-lapped manner and overlap the semi-conductive layer by 5mm, and overlap the cold shrink tube by 3-5mm. Make it a smooth slope.
c: Use a ruler to locate the terminal installation reference line, and use PVC tape to mark it.
d: Use cleaning paper to move the insulating layer to the direction of the semi-conductive layer, and clean the surface.
e: Apply silicone grease evenly on the surface of the insulating layer.
f: Put the terminal head on the cable, align it with the installation reference line, pull out the support bar to shrink the terminal head, and pull the support bar in a counterclockwise direction.
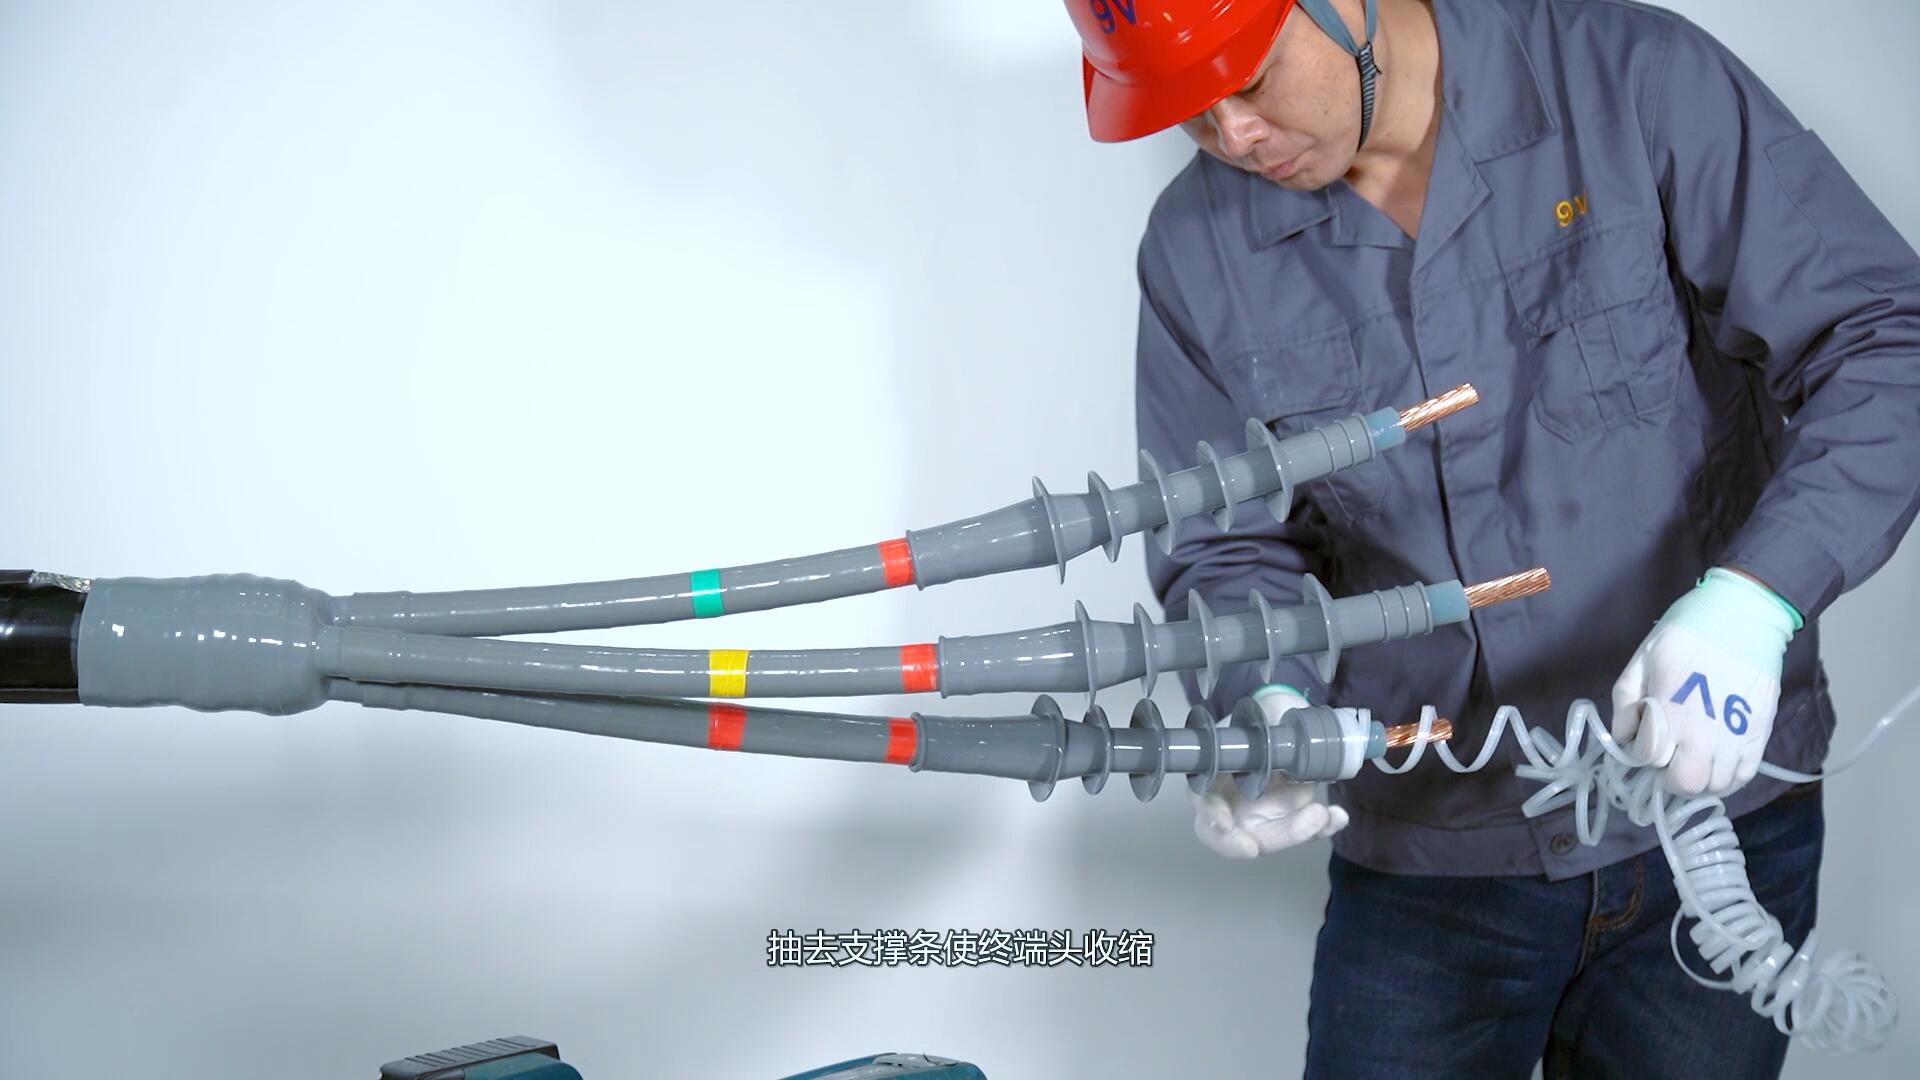
7. Crimp terminal, sleeve sealing tube
a: Set the terminal into the terminal, and press the terminal according to the requirements of the national standard.
b: Wrap the sealant at the crimp of the terminal to fill the gap between the insulating layer and the terminal
c: Wrap a layer of insulating self-adhesive tape outside the sealant.
d: Put on the cold shrink sealing tube, remove the support strip, and cut off the excess cold shrink sealing tube.
8. Installation finish, clean up the site.
Please watch the full video:
Hotline: +86 18001554818 / +86 18068406516


